


 – Full Specifications & Review")


Updated on November 30, 2023
KEY TAKEAWAYS
- Nearby Share Compatibility Check: Before using Nearby Share, ensure your Android device is compatible (Android 6.0 and newer). Check the compatibility in Settings > About Phone.
- Activation Steps: Turn on Nearby Share through Settings > Google > Devices and Sharing or Settings > Connected devices > Connection preferences > Nearby Share. Customize settings like Device Name and Visibility.
- Visibility Options: Customize visibility settings—Everyone, Contacts, or Your devices. Note that Nearby Share requires contact information for seamless connectivity.
- Phone-to-Phone Sharing: Easily share photos, files, or web links with friends and family by tapping the share button and selecting Nearby Share. Follow on-screen prompts for quick and secure sharing.
- Desktop or Laptop Integration: Extend Nearby Share to Chromebooks and Windows PCs. Follow specific steps for each platform to enable seamless file and link transfers between your Android phone and desktop or laptop.
In a world where seamless connectivity is key, Android’s Nearby Share emerges as the answer to hassle-free file sharing. Similar to Apple’s AirDrop, this feature empowers Android users to effortlessly send photos, files, and more to nearby contacts or even their Windows computers.
This comprehensive guide will walk you through the steps, ensuring you harness the full potential of Nearby Share.
Before delving into the realm of hassle-free file sharing, it’s crucial to confirm that your Android device supports Nearby Share. This feature is designed to work smoothly with Android 6.0 and newer versions, ensuring a seamless experience for a majority of users.
To check your device’s compatibility, navigate to the Settings menu, then go to About Phone.
Here, verify that your Android version is 6 or higher. This initial step sets the stage for a hassle-free file-sharing journey, ensuring that your device can leverage the convenience of Nearby Share.
Key Features and Highlights
| Compatibility Check▾ |
| • Ensure your Android device supports Nearby Share. |
| Android 6.0 and Newer▾ |
| • Compatible with Android versions 6.0 and above. |
| Smooth Experience▾ |
| • Promises a seamless file-sharing experience for most users. |
Note
Device-specific variations may occur, especially on devices like Samsung, which may have tweaked Settings menus.
Activating Nearby Share is a straightforward process that enhances your file-sharing capabilities. To begin, navigate to your phone’s Settings menu, a central hub for managing various aspects of your device.
Once there, you can access Nearby Share through different pathways, providing flexibility based on your device’s settings and organization.
The first route is via Settings > Google > Devices and sharing, leading you to the specific menu where Nearby Share can be activated.
Alternatively, you can find it through Settings > Connected devices > Connection preferences > Nearby Share, offering an alternative pathway for users to enable this feature.
Upon accessing Nearby Share, the customization options come into play. Tailor your experience by adjusting the Device Name, allowing for easy identification during sharing sessions.
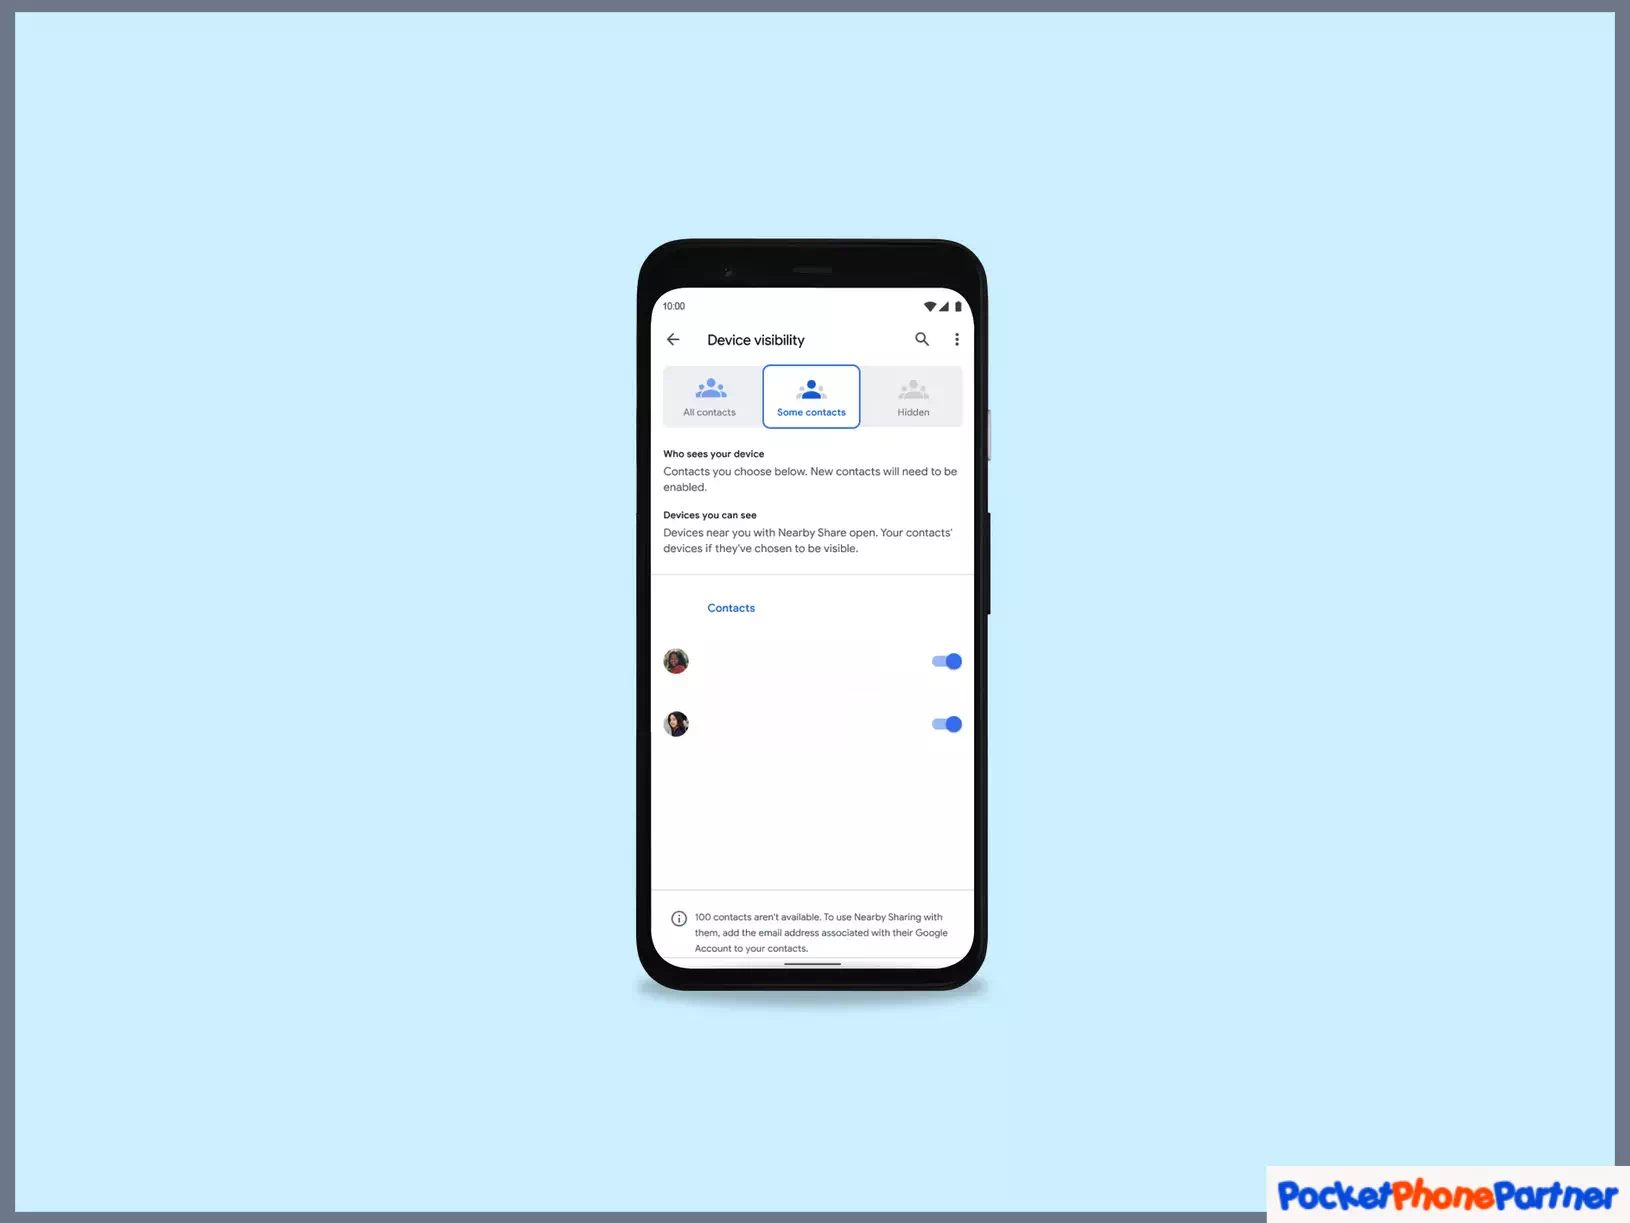
Additionally, fine-tune Visibility settings based on your preferences. This step ensures that Nearby Share aligns with your unique usage patterns and provides a personalized file-sharing environment.
Device Name
Personalize your device name for identification during sharing.
Visibility Options
| Everyone▾ |
| • Make your phone visible to all Nearby Share users. |
| Contacts▾ |
| • Limit visibility to your contacts or select individuals. |
| Your devices▾ |
| • Share exclusively with devices linked to the same Google account. |
Remember
Nearby Share requires your contacts’ email addresses or Google-verified phone numbers for seamless connectivity.
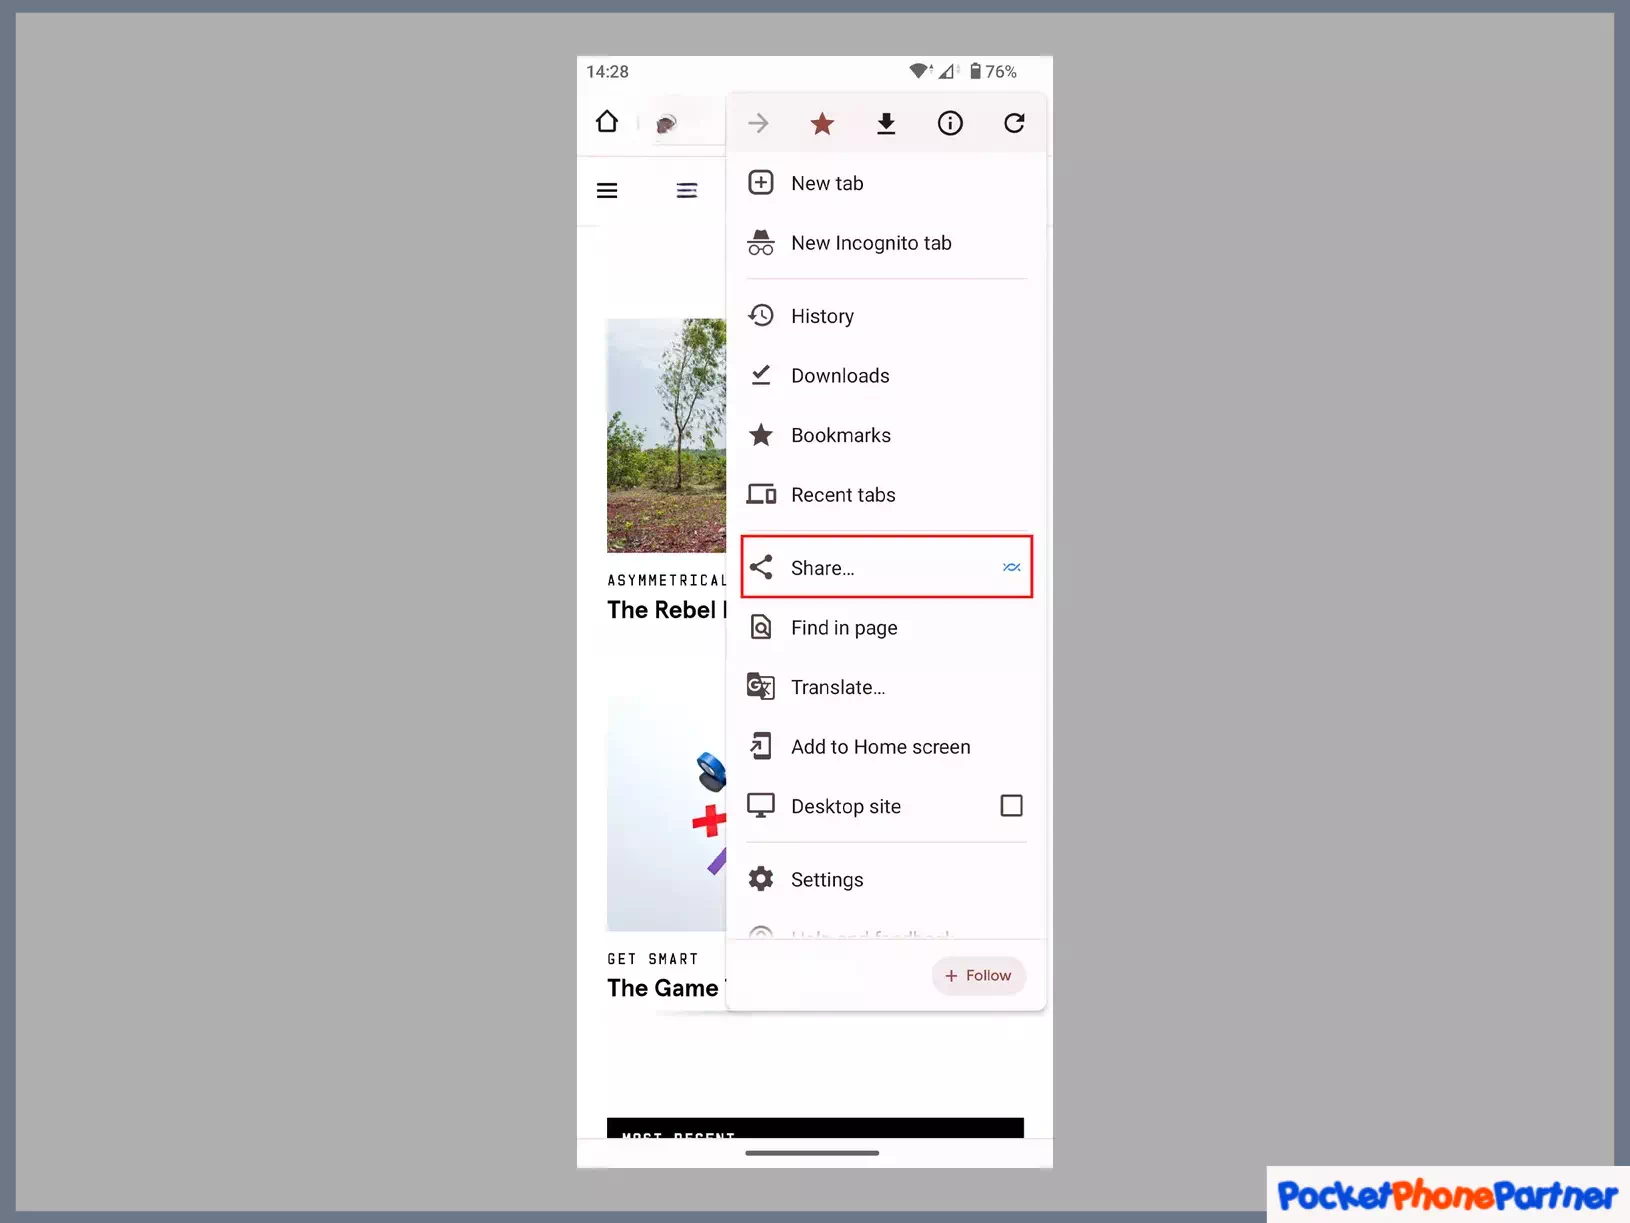
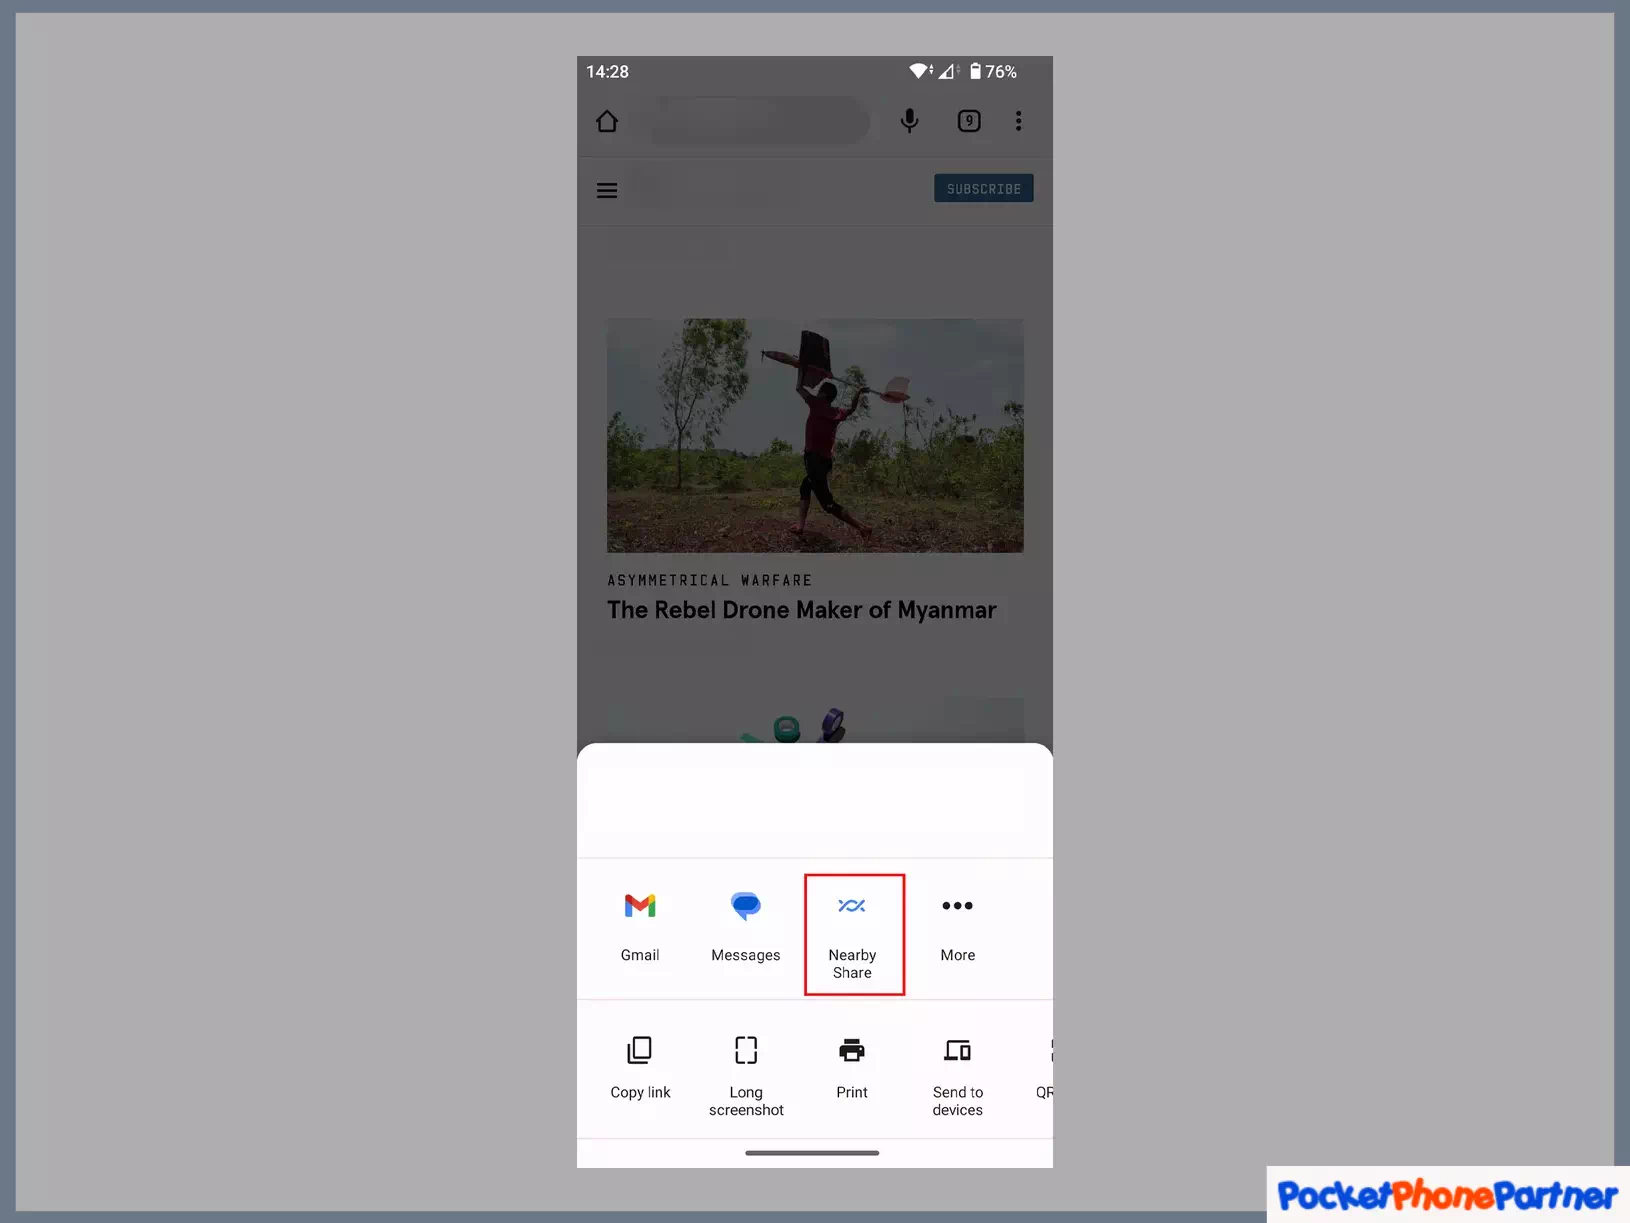
Nearby Share transforms the process of sharing with friends and family into a seamless and intuitive experience. To initiate sharing, start by tapping the share button associated with the content you wish to share—whether it’s photos, files, or web links.
This action triggers the Share Menu, where you can effortlessly select Nearby Share as the chosen sharing method.
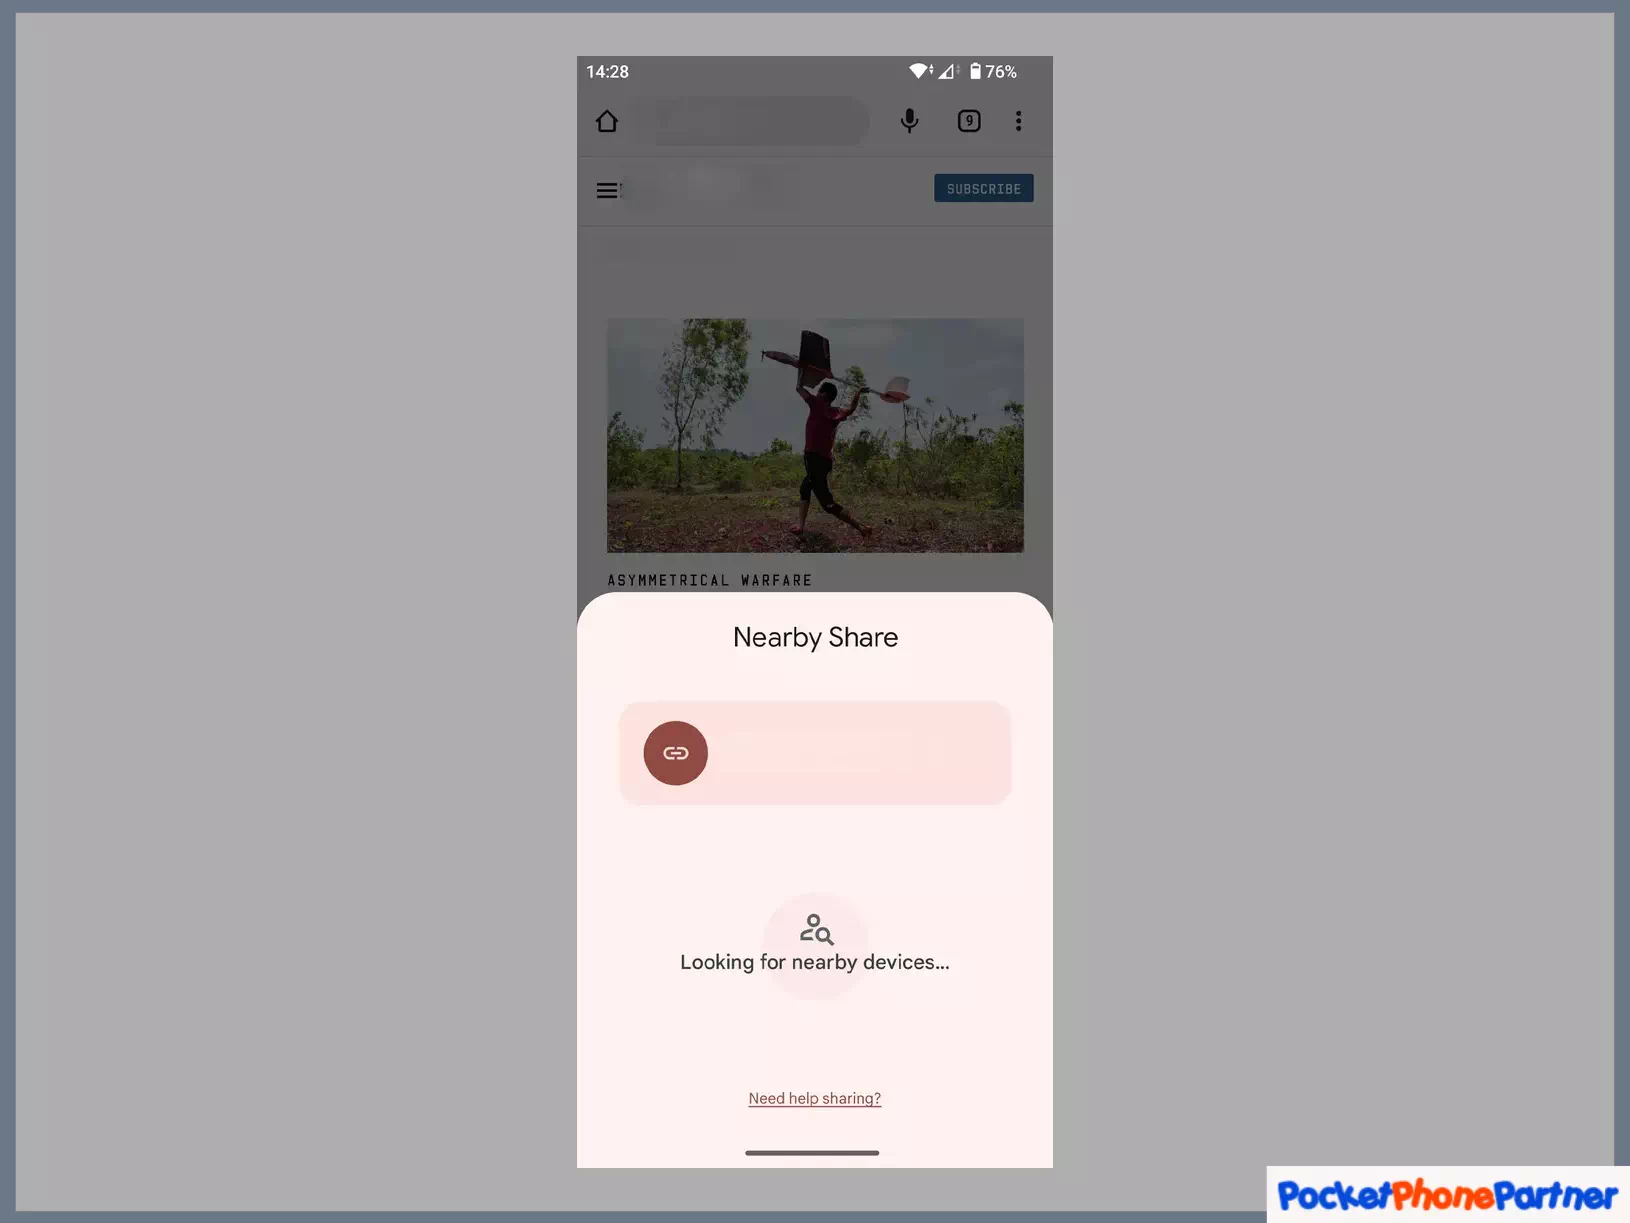
Once Nearby Share is selected, your phone takes charge, automatically scanning for nearby devices within its range. This automated scanning feature streamlines the connection process, eliminating the need for manual intervention and ensuring that the sharing experience remains quick and hassle-free.
As the scanning process identifies nearby devices, on-screen prompts guide you through the steps required to establish connectivity. This user-friendly approach simplifies the sharing process and adds a layer of security, ensuring that your files and links are shared with the intended recipients swiftly and securely.
Key Features and Highlights
| Effortless Sharing▾ |
| • Simplifies sharing with friends and family. |
| Intuitive Process▾ |
| • Tap the share button and select Nearby Share from the Share Menu. |
| Automated Scanning▾ |
| • Phone scans for nearby devices for a seamless connection. |
| On-screen Prompts▾ |
| • Follow prompts for quick and secure sharing. |
The versatility of Nearby Share is not limited to just mobile devices. It effortlessly extends its convenience to desktops and laptops, specifically targeting Chromebooks and Windows PCs.
This expansion broadens the scope of Nearby Share, allowing users to enjoy the benefits of seamless file and link transfers across different platforms.
Extending Nearby Share to Chromebooks involves opening the Settings on your Chromebook, selecting Connected Devices, and then choosing to set up Nearby Share.
This straightforward setup ensures that the functionality seamlessly integrates into your Chromebook’s environment.
For Windows PCs, the extension is facilitated by downloading and installing the Nearby Share app. After installation, open the app, sign in, and customize your PC’s name and visibility settings.
This step ensures that Nearby Share becomes an integral part of your Windows PC, fostering a connected ecosystem where file and link transfers between your Android phone and desktop or laptop occur effortlessly.
In essence, Nearby Share’s effortless extension to Chromebooks and Windows PCs reinforces its adaptability, making it a versatile solution for users who operate across multiple platforms within the interconnected world of Android devices.
For Chromebooks
- Open Settings on your Chromebook.
- Select Connected Devices.
- Choose Set up next to Nearby Share.
- Personalize your Chromebook’s name and visibility settings.
For Windows PCs
- Download and install the Nearby Share app for Windows. Open the app and sign in.
- Customize your PC’s name and visibility settings.
- Now, enjoy swift file and link transfers between your Android phone and desktop or laptop.
Key Features and Highlights
| Platform Integration▾ |
| • Nearby Share seamlessly extends to Chromebooks and Windows PCs. |
| Effortless Extension▾ |
| • Easily bring the convenience of Nearby Share to desktops and laptops. |
Overall Conclusion
With Android’s Nearby Share, the era of complicated file transfers is a thing of the past. Seamlessly connect with nearby devices or extend the convenience to your desktop or laptop. This guide ensures you harness the full potential of Nearby Share, making file sharing a breeze in the interconnected world of Android devices.
Embrace the simplicity and efficiency of Android’s Nearby Share today!
Your thoughts are welcome. Feel free to leave any comments below.


